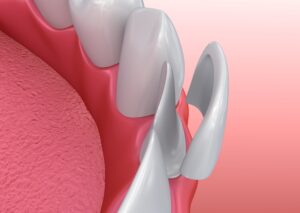
 If you’re ready to invest in the smile of your dreams with veneers, you’re making a great investment. You’ll enjoy dramatic results using a minimally invasive procedure. Although you’re excited to get started, it’s normal to have some concerns about the road ahead. There’s no reason to worry. Here’s the step-by-step process of getting veneers.
1. Consultation
A consultation with your cosmetic dentist is your first step toward a stunning smile. Your dentist will examine your mouth and learn more about your concerns to determine if veneers are right for you. They will perform diagnostic services to ensure your teeth and gums are healthy.
2. Preparatory Treatments
Your mouth must be healthy before any elective services or you’ll just cover up the issues until they turn into dental emergencies. If your dentist finds anything concerning during your examination, it must be addressed before moving forward. It’s not uncommon to require a little prep work, like a dental cleaning, filling, or gum disease treatment.
3. Tooth Etching
After any preliminary procedures, you’ll be scheduled for the first phase of your transformation. Your dentist will clean your teeth and lightly etch their surfaces. This is necessary to ensure a strong bond and allows your veneers to sit flush. Although you’ll sacrifice a little enamel, it won’t harm the health of your teeth, but they will need to always be covered by restorations.
4. Design Process
Once your teeth have been prepped, your dentist will take a digital impression of your mouth, which will integrate with advanced technology to design your restorations. Your dentist will specify the size, shape, and color of your veneers to create a dazzling smile.
5. Porcelain Veneer Creation
The information is sent to the dental lab, where they will be created with the utmost precision. This can take a couple of weeks, so your dentist will apply temporary veneers while you wait. Not only will they protect your teeth, but you can also “try on” your new smile.
6. Placing Your Final Veneers
After the dental lab sends your veneers back to your dentist, you’ll return to their office for the final phase of your treatment. Your cosmetic dentist will remove the temporary restorations and bond your final veneers to your teeth. You’ll walk out of your appointment with a picture-perfect smile.
Get the Most from Your Investment
Veneers can last for a decade or longer with the right aftercare. You can get the most from your veneers with good oral hygiene and a nutritious diet. Break any bad habits that can damage your restorations, like chewing on your fingernails. Visit your dentist every 6 months for a cleaning and checkup for a healthy, beautiful smile that lasts.
About Dr. Anthony Dillard
Dr. Dillard achieved his dental degree at Baylor College of Dentistry. He is committed to continuing his education to provide the most up-to-date solutions, like Invisalign and cosmetic dentistry. Request an appointment through his website or call his office at (972) 394-1492.
