
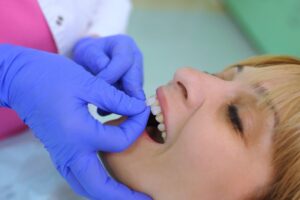
Dental veneers are one of the most popular cosmetic dentistry treatments for improving the appearance of stained, chipped, uneven, or misshapen teeth. Veneers can create a brighter, more balanced smile with long-lasting results. Many patients are also interested in no-prep veneers, which offer a more conservative alternative in certain cases. Understanding the process can help patients feel more comfortable and prepared before beginning treatment.
Step 1: The Consultation
The first step for both traditional veneers and no-prep veneers is a cosmetic consultation. During this appointment, the dentist evaluates your teeth, gums, bite, and overall oral health to determine whether veneers are the right option.
Patients discuss their smile goals, including concerns about tooth color, shape, spacing, or alignment. The dentist may take photographs, X-rays, or digital scans to help plan treatment.
Not everyone is a candidate for no-prep veneers, so the dentist will recommend the most appropriate option based on your needs.
Step 2: Treatment Planning and Smile Design
Once you decide to move forward, the dentist begins designing your new smile. Shade selection, tooth proportions, and overall appearance are carefully planned to ensure natural-looking results.
Some dental offices use digital smile design technology or wax models to preview how the veneers may look before treatment begins.
The goal is to create veneers that complement your facial features and blend naturally with surrounding teeth.
Step 3: Tooth Preparation
This stage differs between traditional veneers and no-prep veneers.
Traditional Veneers
For traditional veneers, a small amount of enamel is usually removed from the front surface of the teeth. This allows the veneers to fit properly and look natural without appearing bulky.
The amount of enamel removed is minimal, but it is typically permanent. After preparation, impressions or digital scans are taken and sent to a dental laboratory where the custom veneers are created.
Temporary veneers may be placed while the permanent ones are being fabricated.
No-Prep Veneers
No-prep veneers require little to no enamel removal. Because they are thinner than traditional veneers, they can sometimes be bonded directly to the natural teeth without significant reshaping.
This makes the process more conservative and often more comfortable. However, no-prep veneers are not ideal for every patient, especially those with severe discoloration or significant alignment issues.
Step 4: Veneer Placement
Once the final veneers are ready, the dentist checks the fit, color, and appearance before bonding them permanently to the teeth.
The teeth are cleaned and prepared, and a strong dental adhesive is used to secure the veneers in place. The dentist then makes final adjustments to ensure proper comfort and bite alignment.
Patients typically leave the office with an immediately transformed smile.
Step 5: Caring for Veneers
After placement, good oral hygiene is important for maintaining veneers long-term. Patients should brush, floss, and attend regular dental visits.
Avoiding habits like chewing ice, biting hard objects, or grinding teeth can also help protect veneers from damage.
Both traditional veneers and no-prep veneers can dramatically improve the appearance of a smile. While the processes are similar, no-prep veneers involve less alteration of the natural teeth and may be suitable for select patients. A consultation with a cosmetic dentist is the best way to determine which option can help you achieve the healthy, confident smile you want.
About the Author
Dr. Anthony Dillard has been practicing dentistry for more than a decade. He earned his dental doctorate at the Baylor College of Dentistry and has pursued more than 180 hours of continuing education in topics including Invisalign, BOTX, dermal fillers, and more. If you’re interested in traditional or no-prep veneers, Dr. Dillard and his team would be happy to help. Book online or call our Carrollton office at (972) 394-1492.